

The first time I made this casserole, my husband walked into the kitchen, took one whiff, and said, “Did you order cheesesteaks for dinner?” When I told him it was actually a casserole I’d thrown together with ground beef and whatever cheese we had in the fridge, he raised an eyebrow like I was pulling his leg.
Twenty minutes later, he was back for thirds.
My kids? They devoured it without asking what was in it, which is basically a parenting miracle. No complaints about onions. No picking out the peppers. Just pure, cheesy bliss on their plates.
Honestly. This. Works.
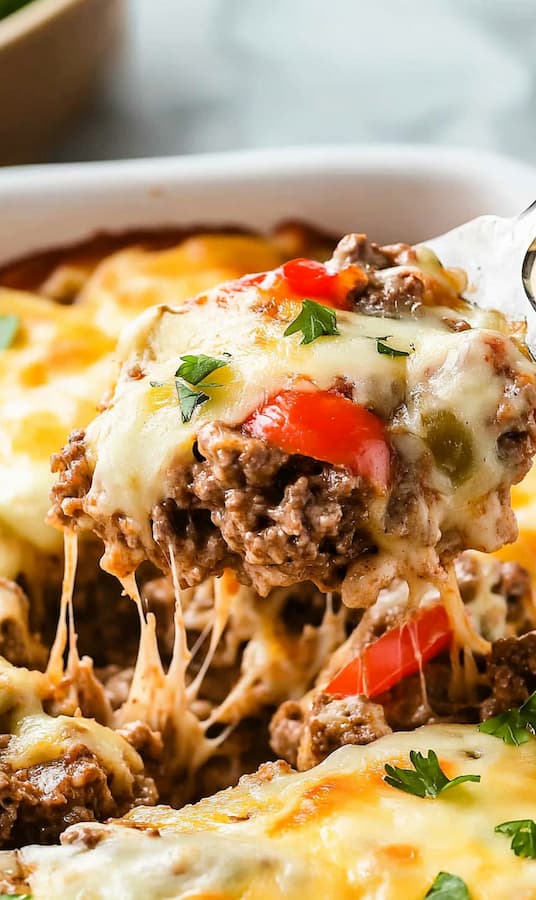
It’s got all the soul-warming flavors of a classic Philly cheesesteak but in a format that actually makes sense for feeding a family. No wrestling with hoagie rolls or trying to keep everything from falling out the back. Just layers of seasoned beef, melty cheese, and those perfect sautéed veggies that make your kitchen smell like heaven.
Why You’ll Love This Philly Cheesesteak Casserole
All the Flavor, Zero Sandwich Drama: You get every bit of that indulgent cheesesteak taste without the juggling act of trying to eat a massive sandwich without making a mess. Everything stays put in the casserole dish, which my kids definitely appreciate.
Low-Carb Without the Sacrifice: Skip the hoagie roll and you’ve got yourself a keto-friendly dinner that doesn’t feel like you’re missing anything. I’ve served this to friends who had no idea they were eating low-carb until I mentioned it later.
Ridiculously Customizable: Want mushrooms? Toss them in. Prefer a different cheese? Go for it. This recipe is basically a canvas for whatever you’ve got in your fridge.
Leftovers That Actually Get Better: Day two of this casserole might be even better than day one. The flavors have time to get cozy together, and reheating is a breeze.
Philly Cheesesteak Casserole Recipe
Ingredients
| Ingredient | Amount |
| Ground beef | 2 lbs |
| Onion, diced | 1 large |
| Bell peppers (green, red, or a mix), diced | 2 large |
| Garlic, minced | 2 cloves |
| Cream cheese | 8 oz (1 package) |
| Worcestershire sauce | 2 tbsp |
| Salt and pepper | To taste |
| Provolone cheese | 8 oz (sliced) |
| Mozzarella cheese | 1½ cups (shredded) |
| Olive oil | 1 tbsp |
Step-by-Step Instructions
1. Preheat Your Oven
Set your oven to 350°F (175°C) and let it fully preheat while you prep everything else. Trust me on this one. A properly heated oven is what gives you that gorgeous golden, bubbly cheese top we’re all here for.
2. Cook the Ground Beef
Heat the olive oil in a large skillet over medium heat. Add your ground beef and break it up with a spatula as it cooks. Season generously with salt and pepper right from the start.
Cook for about 7-8 minutes, stirring occasionally, until the beef is completely browned with no pink spots. When it’s done, transfer the meat to a plate and drain off any excess grease. Nobody wants a greasy casserole.
3. Sauté the Veggies
Here’s where the magic starts. In the same skillet (don’t clean it! all those browned bits add flavor), toss in your diced onions and bell peppers.
Sauté them for about 5 minutes until they start to soften and get those lovely caramelized edges. This step is crucial. You want the onions to get sweet and the peppers to lose that raw crunch.
Add the garlic last and cook for just one more minute. Garlic burns fast, so keep an eye on it.
4. Combine the Beef and Veggies
Return your cooked ground beef to the skillet with the vegetables. Give everything a good stir to distribute evenly.
Pour in the Worcestershire sauce and let the whole mixture simmer for 2-3 minutes. This is what gives you that deep, savory flavor that makes people think you spent way more time on this than you actually did.
5. Create the Creamy Base
Add the cream cheese to the skillet and stir until it completely melts and coats everything in a silky, rich sauce. Make sure there are no lumps. This creamy base is what transforms a simple beef and veggie mixture into something special.
The cream cheese balances out the savory elements and gives the casserole that indulgent feel that makes it comfort food.
6. Transfer to Your Baking Dish
Lightly grease a 9×13-inch casserole dish and spread your beef mixture evenly across the bottom. Take a moment to spread it into the corners. This creates your flavor-packed foundation.
7. Layer on the Cheese
This is where it gets fun. Lay the provolone slices over the entire surface of your beef mixture. Don’t worry about perfect coverage. Just get it reasonably even.
The provolone gives you that authentic Philly cheesesteak flavor with its sharp, buttery taste. Then sprinkle the shredded mozzarella on top for extra meltiness and that gorgeous cheese pull we all love.
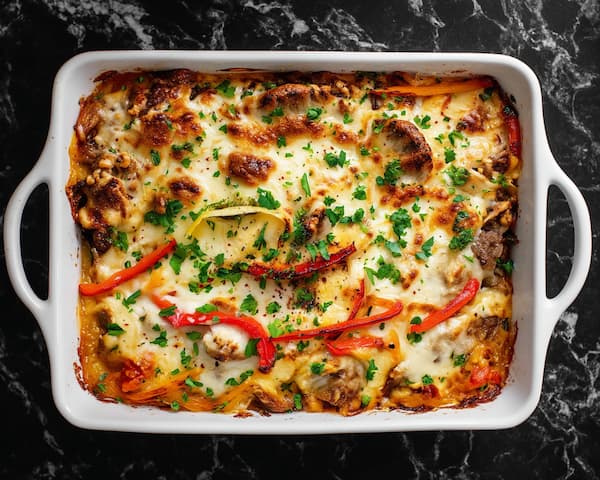
8. Bake Until Golden and Bubbly
Slide your casserole into the preheated oven and bake for 20-25 minutes. You’ll know it’s ready when the cheese is melted, bubbly, and starting to turn golden in spots.
The smell alone will have everyone gathering in the kitchen asking when dinner’s ready.
9. Rest and Serve
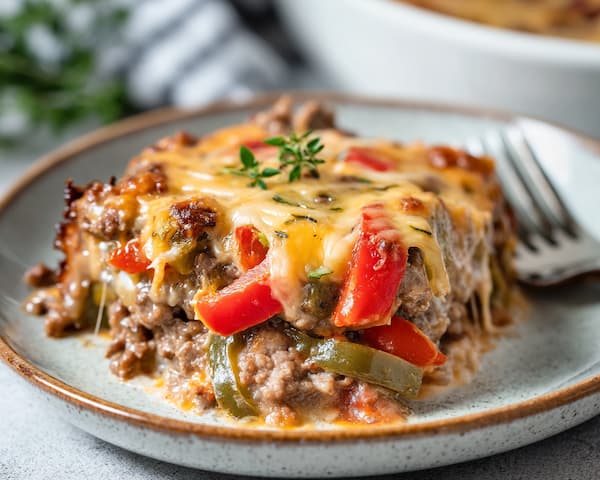
Let the casserole sit for about 5 minutes before serving. I know it’s tempting to dive right in, but this resting time helps everything set up so you get clean slices instead of a molten mess.
Serve it up with a simple green salad or some roasted broccoli to balance out all that cheesy goodness.
Ways to Make It Your Own
Add Some Mushrooms: Slice up some button or baby bella mushrooms and sauté them with the onions and peppers. They add this earthy richness that pairs beautifully with the beef.
Turn Up the Heat: If your family likes spice, dice up a jalapeño or two and cook them with the veggies. Or just sprinkle some red pepper flakes over the top before baking.
Switch Up the Cheese: While provolone is traditional, you can experiment with sharp cheddar, Swiss, or even Monterey Jack. Each one gives you a slightly different flavor profile.
Go Full Keto: Replace the bell peppers with roasted zucchini or cauliflower if you’re keeping carbs super low. Both vegetables hold up well and soak up all those delicious flavors.
Storage and Reheating Tips
- Storing Leftovers
Let the casserole cool completely, then store it covered in the fridge for up to 4 days. I like to portion it out into individual containers for easy grab-and-go lunches.
- Freezing for Later
This casserole freezes beautifully for up to 3 months. Wrap it tightly in plastic wrap and then aluminum foil, or divide into freezer-safe containers. Thaw overnight in the refrigerator before reheating.
- Reheating Without Losing the Magic
For single portions, the microwave works fine. Just heat for 1-2 minutes until warmed through.
For the whole casserole, cover with foil and reheat in a 350°F oven for 15-20 minutes. Remove the foil for the last 5 minutes if you want to crisp up the cheese on top again.
Conclusion
Look, I’m not saying this will replace your love for a good cheesesteak sandwich. But for busy weeknights when you want those same amazing flavors without the fuss? This casserole delivers.
It’s one of those recipes that feels fancy enough for company but easy enough for a Tuesday night when everyone’s hungry and you’ve got 45 minutes to get dinner on the table. Plus, watching my kids actually eat vegetables without complaint is basically priceless.
The best part? It makes the whole house smell incredible, and you’ll have enough leftovers to make tomorrow’s lunch decision a no-brainer. Sometimes the simplest changes to classic recipes are the ones that stick around longest.